

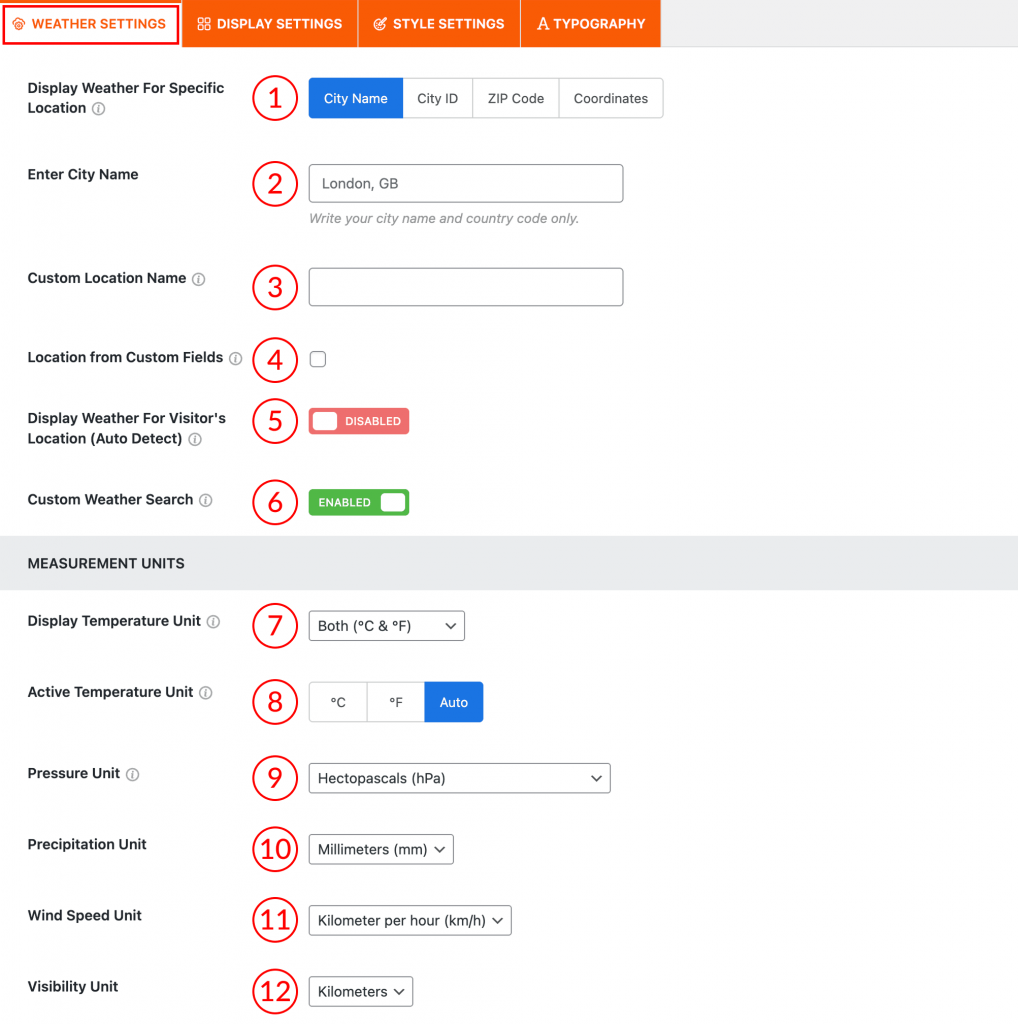
(1) Display Weather For Specific Location: You can specify your location by City Name / City ID / ZIP Code / Coordinates to display weather details. Choose the option that best suits your needs.
Note: It is mandatory to create weather shortcodes with Geo Coordinates for a specific location to show the weather forecast data. Read the docs to learn how to set Coordinates: https://locationweather.io/docs/docs/how-to-display-weather-details-with-geo-coordinates/
(2) Enter City Name: Enter your City Name for weather details if you have selected the City Name option for your location. For Example: Moscow, RU, Sydney, AU.
Note: This method of inputting a location might not be the most dependable. If your city has the same name as a city in a different country or state, the tool might not correctly identify the location you intended. In such situations, kindly utilize alternative choices like Zip Code or Geo Coordinates.
(3) Custom Location Name: Instead of using the default city name that comes from OpenWeatherMap, you can set a custom location name in the “Custom Location Name” text field. Then, the default name will be replaced.
(4) Location from Custom Fields: You can use this option to display weather information from custom fields. Let’s say you wish to use this custom field option to display different location-specific weather information in various posts or pages. With this option, it’s easy to accomplish. For details, Read More→
(5) Display Weather For Visitors Location (Auto Detect): You can show your website visitors’ weather data from the location they are accessing your site by turning on this option. Using IP geolocation, the plugin will determine the visitor’s location and display the local weather information.
(6) Custom Weather Search: The Custom Weather Search option allows visitors to search for weather by entering any location directly on your website. Once this option is enabled (as shown in the screenshot with the green toggle), a search bar will appear on the frontend weather display.
Visitors can type a city name, city ID, ZIP code, or coordinates, and the weather information will update in real-time based on their input.
This feature is great for users who want to check the weather in different locations without needing to reload the page or navigate elsewhere.
(7) Display Temperature Unit: Choose temperature unit(s) based on your visitor’s preferences from this option. You can display the temperature in two different units (°C and °F) with five available options.

(8) Active Temperature Unit: From this option, select an active temperature unit that will remain selected on the front end. If you select Auto, it will detect the visitor’s location and show the preferred unit °C or °F of that location selected automatically.
(9) Pressure Unit: Select an atmospheric or air pressure unit from the seven different variations.
(10) Precipitation Unit: Select the precipitation unit from here. Usually, millimeters per hour (mm/hr) are used in the metric system, and inches per hour in the imperial system.
(11) Wind Speed Unit: Select the wind speed unit from here. There are four different units available.
(12) Visibility Unit: Select a visibility unit for your weather view from two different units.