

The AI Weather Assistant is a powerful, human-like weather reporter designed to transform how your audience interacts with your site. Instead of just viewing static data, visitors can ask questions and receive instant, personalized “weather stories” in over 50 languages. From health and safety tips to global forecasts, the assistant delivers actionable advice tailored to every user.
Important Note: To enable the AI Weather Assistant, you must select the OpenWeather One Call API as your data source in the Weather API Settings. Read this guide to choose your API plan.
Quick Setup Guide
Setting up your assistant is a seamless process that takes just four easy steps:
Step 1: Select Required API
Navigate to your Weather API Settings and make sure OpenWeather One Call API is selected. This is mandatory for the assistant to generate its intelligent responses.
Step 2: Enable and Set Button Position
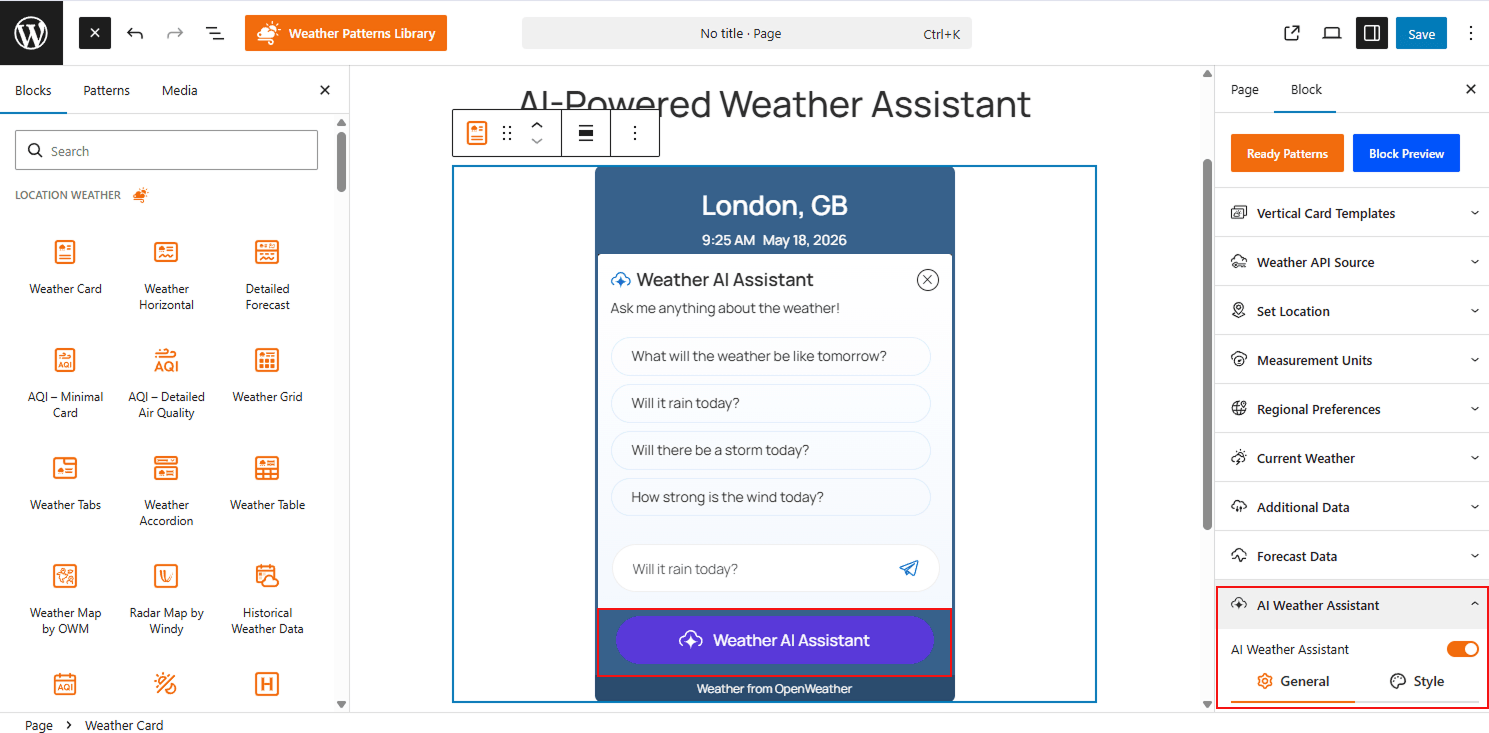
- Enable the AI Assistant: Open the settings for the Weather Block you want to enhance, then toggle the AI Weather Assistant to ON.
- Set Assistant Button Display Position: There are two beautiful button positions available, Static & Floating. Choose one as your preference.
- Chat Appearance: Select how the chat window reveals itself, such as Slide In or Pop-up.
Step 3: Customize Style
Use the Style tab to align the assistant theme with your site’s design:
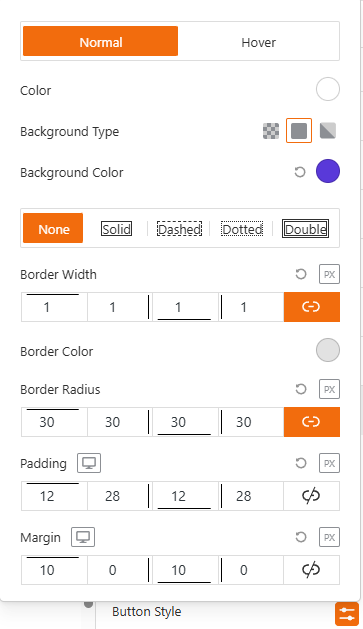
- Button Style: Customize background, text, and border colors for both Normal and Hover states.
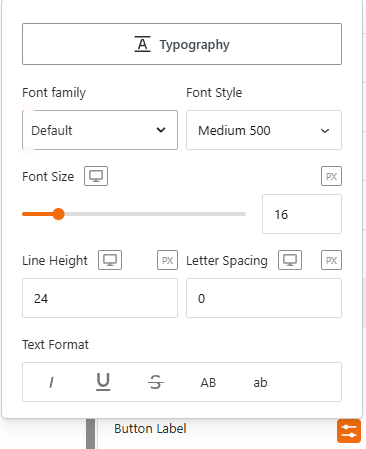
- Typography: Control font family, size, weight, and line height.
- Icons: Toggle and style the icon, adjusting its size and its gap from the text.
Step 4: Interact with AI
After setting up all the above, your Assistant is ready to provide live insights based on user queries. On your live site, visitors can click the button to ask questions using Ready Prompts (pre-set bubbles) or by typing their own Custom Questions.
Let’s explore the details, settings & configurations:
General Settings:
From this panel, you can easily configure and manage how the assistant button appears on your site through the AI Weather Assistant settings:
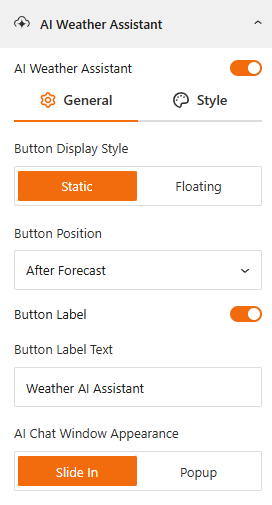
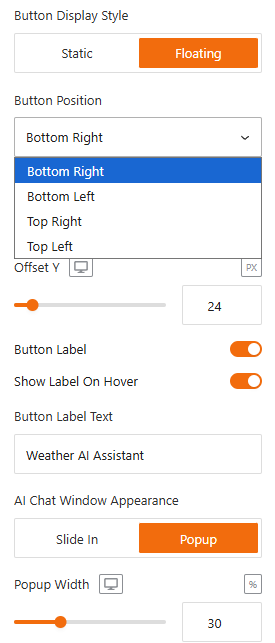
- Assistant Button Display Style: To display the AI Assistant button, there are two styles to choose from: Static to embed the button within your weather block or Floating to keep it fixed in a specific corner of the weather widget.
- Assistant Button Position: For Static, choose positions like “After Forecast” or “Above Location Name”. For Floating, select a position like “Bottom Left/Right and Top Left/Right” and adjust the Offset for pixel-perfect placement.
- Button Label: Toggle the Button Label text to ON or OFF and customize it (e.g., “Ask AI Assistant”).
- Show Label On Hover: Toggle this to Show or Hide Button Label on Hover.
- Chat Appearance: Select how the chat window reveals itself, such as Slide In or Pop-up. For the pop-up, set its width as needed.
Style the Assistant
Use the Style panel to design the assistant’s look with your brand identity:
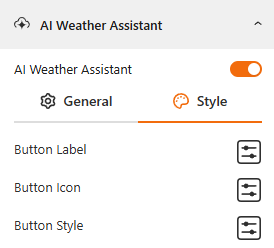
- Button Style: Customize the background color, text color, and border settings for both Normal and Hover states. You also can set a Border Radius for rounded edges and adjust Padding and Margin to control the button’s internal and external spacing.
- Button Label Typography: Get full control over font family, size, weight, and line height for the button text.
- Button Icon: Toggle the assistant icon to show or hide the assistant icon and adjust its Size and Gap as needed.
Live Visitor Interaction:
The front-end interface provides a seamless experience for your users:
- Prompt Selection: Visitors can click on ready-made question bubbles like “How is the weather today?” for instant results.
- Personalized Results: The AI responds with a descriptive message including temperature, sky conditions, humidity, and helpful tips tailored to the user’s inquiry.
That’s it!