

- Plugin Installation
- Add Weather API Key
- Creating Weather Showcase
- Displaying the Weather Showcase
After purchasing the plugin, you may look forward to a quick guide where you will get all the information from installation to displaying the weather showcases on the web pages. In this article, you will get step-by-step guidelines to use the plugin in no time.
Plugin Installation
After the download, you’ll find the files in the zip folder on your computer named location-weather-pro.zip. Please follow the steps below to install the “Location Weather Pro” version:
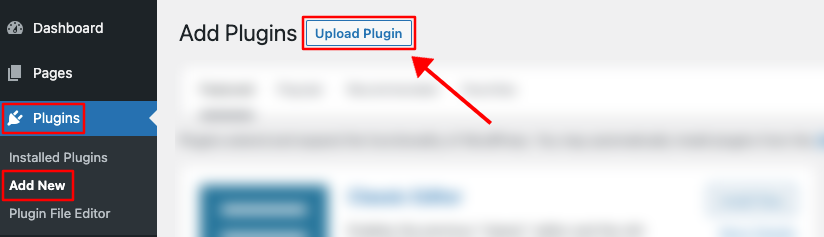
1) Go to your WordPress website Dashboard.
2) Navigate to Plugins → Add New → Upload Plugin.
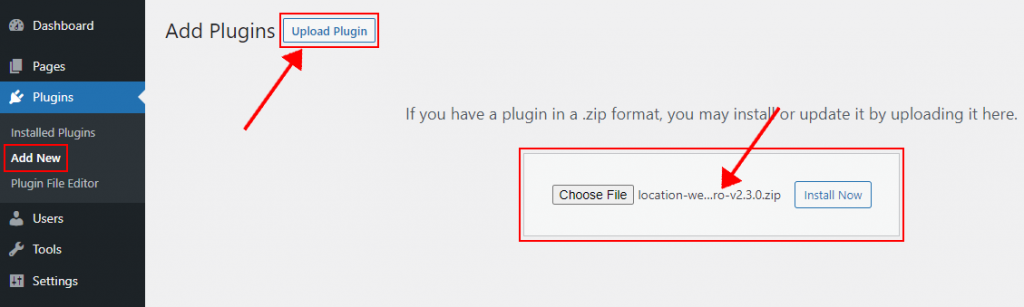
3) Once you click the “Upload Plugin” button, you will get the plugin upload option from your computer. Select the “location-weather-pro.zip” file from your computer and click on the “Install Now” button.
4) After successfully installing the plugin, click “Activate Plugin“ to activate the plugin.
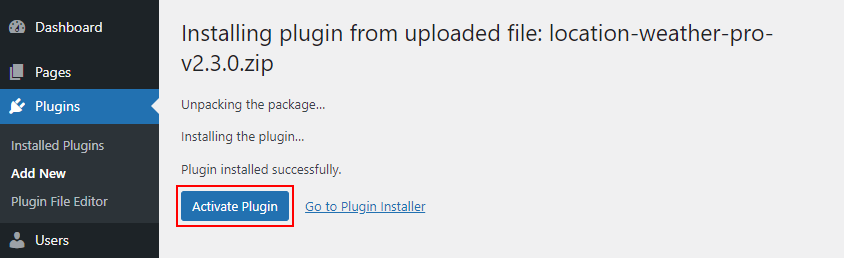
5) After activating the Location Weather Pro plugin, you are ready to add weather showcases to your post, page, widget, or anywhere you like.
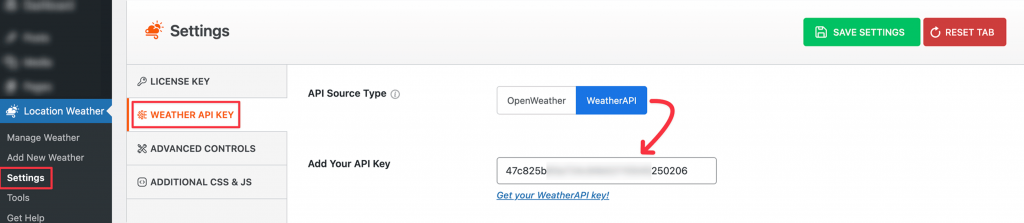
Add Weather API Key
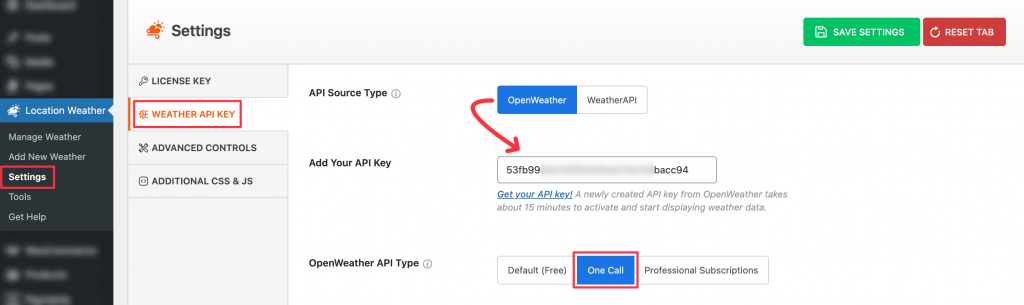
The Location Weather plugin has seamless integration with two API Sources (OpenWeather and WeatherAPI) to retrieve real-time weather data.
- OpenWeather API Key
Suppose you have acquired your API key from openweathermap.org. Then, please log into your openweathermap account and copy your free API key. Now, navigate to Location Weather > Settings > Weather API Key, select API Source Type > OpenWeather, and insert the API key here.
Note: See the step-by-step guideline to get an OpenWeather API key here→
- WeatherAPI Key
If you have acquired your API key from weatherapi.com, please log into your weatherapi account and copy your free API key. Now, navigate to Location Weather > Settings > Weather API Key, select API Source Type > WeatherAPI, and insert the API key here.
Note: See the step-by-step guideline to get a WeatherAPI’s API key here→
Creating Weather Showcase
Creating a Weather Showcase is super easy and fast. It can be done within a minute.
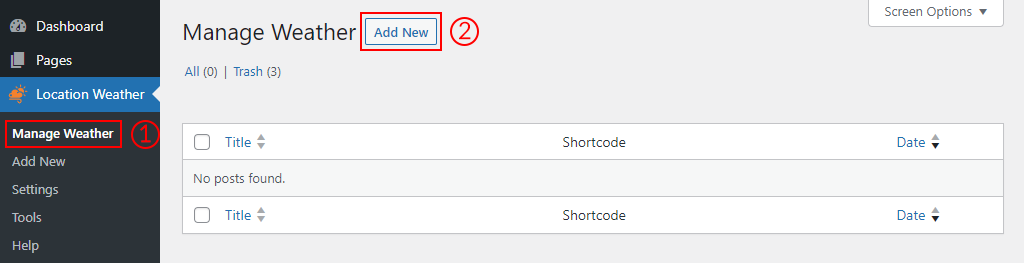
1) Click on the Manage Weather menu.
2) Click on the Add New button.
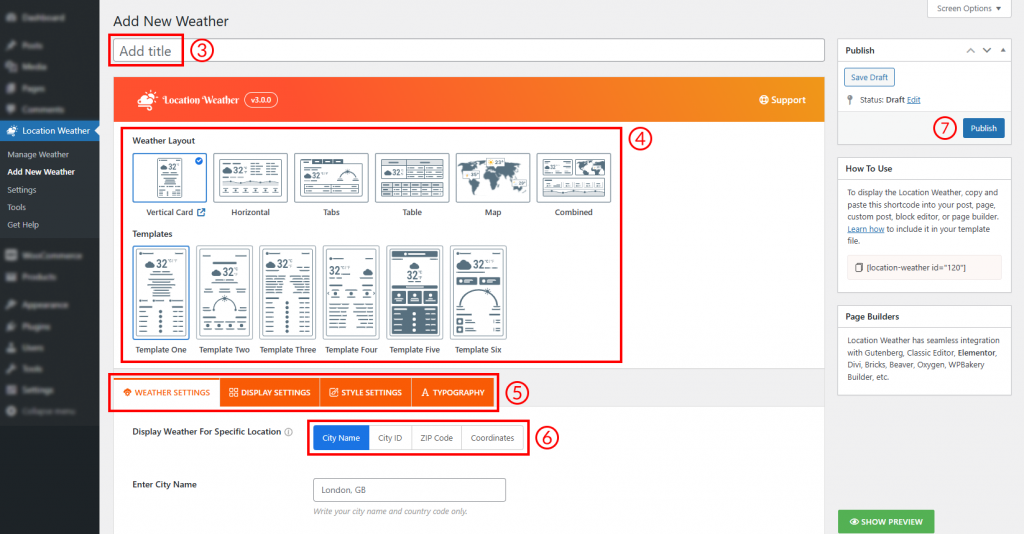
3) Type a Section Title for your Weather Showcase (optional).
4) Select a Layout from 4 different layouts (Vertical Card, Horizontal, Tabs, Table) and a pre-made Teamplate for that layout.
5) You can customize the Weather Showcase from the Settings Tabs as you want.
6) Enter the location info using City Name / City ID / ZIP or Postal Code / Coordinates.
Note: It is mandatory to create weather shortcodes with Geo Coordinates for a specific location to show the weather forecast data. Read the docs to learn how to set Coordinates: https://locationweather.io/docs/docs/how-to-display-weather-details-with-geo-coordinates/
Additionally, it is recommended to use Coordinates with the One Call API to display the weather data accurately.
7) Then click on the Publish Button.
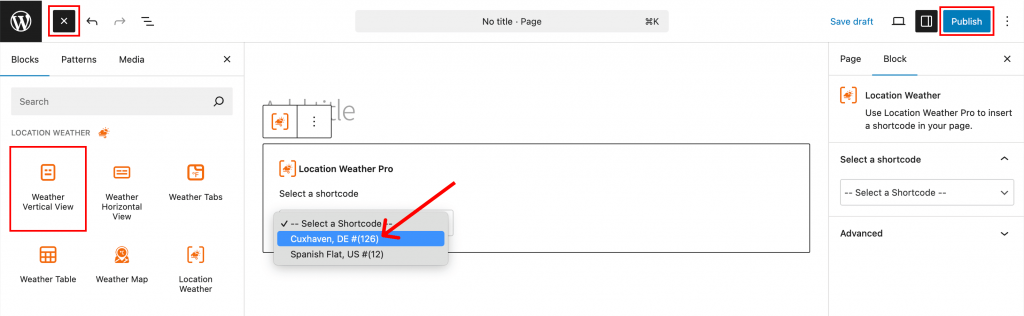
Displaying the Weather Showcase
After creating and publishing a weather view, you can show the Weather View anywhere on your site, like posts, pages, or widgets. You can find the Location Weather block on Gutenberg, by which you can simply add and show any of your weather views on your site.
See the Live Demos here →