The Custom Location Weather Search feature allows your website visitors to dynamically search and view weather information for any location directly on the frontend. This enhances user interaction by providing a real-time weather lookup tool.
Here’s how to enable and use the custom location search feature.
1. Enable Custom Weather Search (Backend):
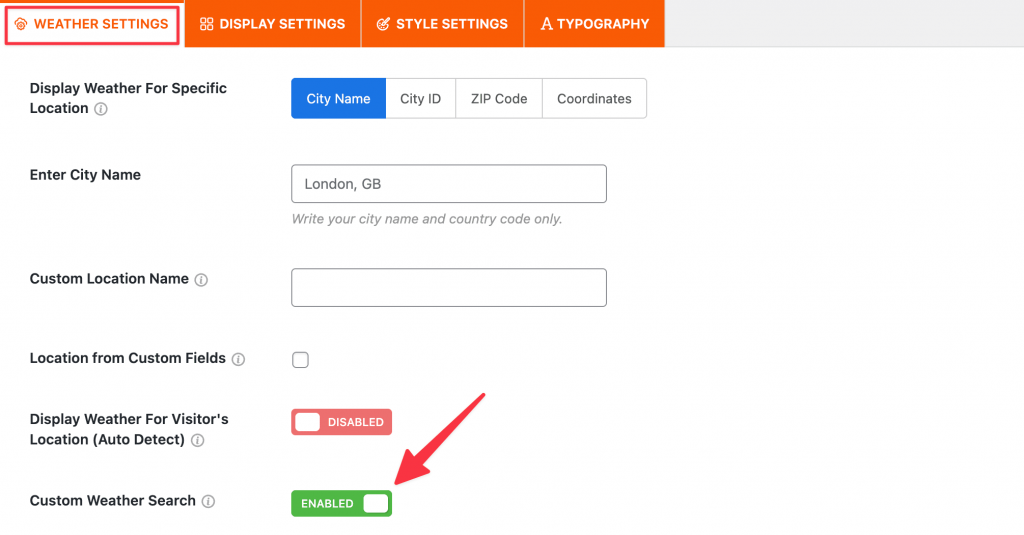
- From your WordPress Dashboard, navigate to Location Weather and then click on “WEATHER SETTINGS” tab.
- Scroll down to the option labeled “Custom Weather Search”.
- Ensure the toggle switch next to “Custom Weather Search” is “ENABLED” (green).
- While in the settings, you can also define the default location if no search is performed or if you are not displaying weather for the visitor’s auto-detected location. You can specify this by “City Name,” “City ID,” “ZIP Code,” or “Coordinates.”
- Click Save Changes (not visible in screenshot but implied for settings).
2. Use the Custom Location Search (Frontend):
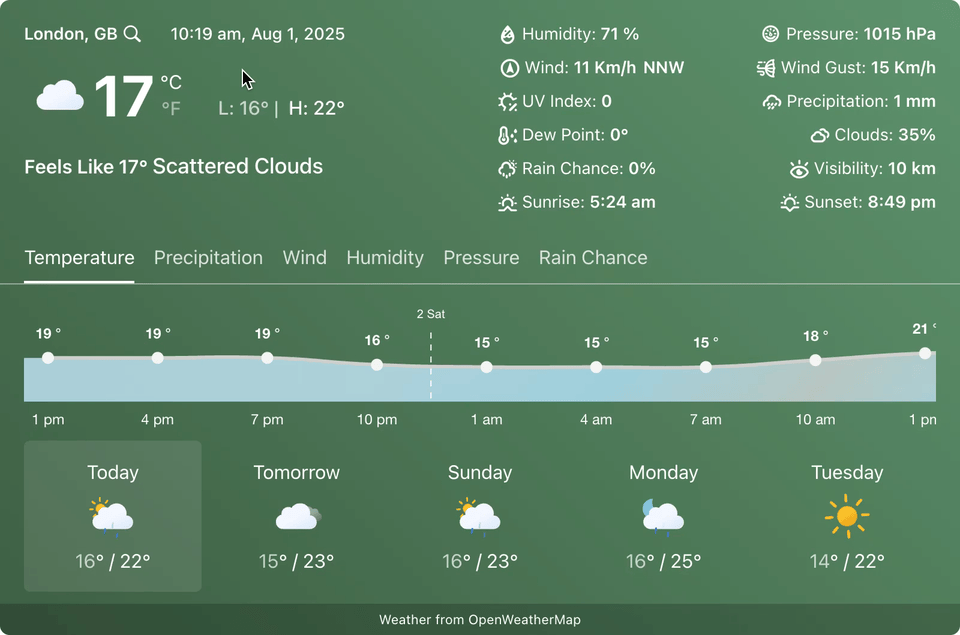
- Once enabled in the backend, any weather block you add to your page (like a Weather Card, Weather Horizontal, Weather Detailed Forecast, etc.) will display a “Search location” bar on the frontend.
- Your website visitors can then type a city name, ID, ZIP code, or coordinates into this search bar.
- After entering the location, they can click the magnifying glass icon or press Enter.
- The weather information displayed in the block will instantly update to show the weather for the searched location.