
Howdy, are you looking for the easiest blog on how to add weather widgets in WordPress?
Welcome!
A WordPress weather widget not only boosts sales for weather-impacted businesses but also elevates the user experience by making your website more aesthetic, interactive, and helpful with necessary weather information. Plus, it increases your site’s dwell time, which significantly helps your site rank higher on SERPs.
In this blog, I’ll share the step-by-step process to add an accurate and detailed weather forecast to your WordPress website.
So, let’s get in.
TL;DR / Key Takeaways
- Best Weather Widget Solution
- Multiple Weather API Keys (Free & Paid)
- Detailed real-time weather, Up to 96h & 16d Forecasts
- Simple visual steps to add a weather widget in WordPress Gutenberg & Classic
- Advanced weather data: AQI, Live weather map, astronomical data, weather historical data, and more
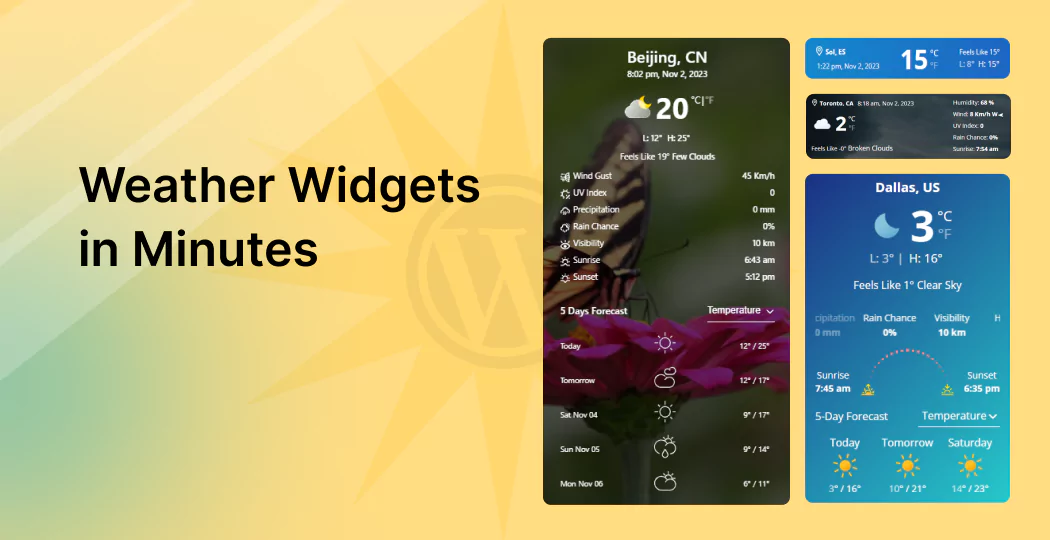
What is a Weather Widget / Weather Forecast?
A weather widget is a dynamic section or interface that displays current and upcoming weather information for a week or a month. It may include temperature, rain chance, humidity, air quality, historical weather data, and more.
You can display weather forecasts for your business location, visitors’ locations, or any place worldwide with an easy search.
What is the Best Way to Add a Weather Widget in WordPress and Why?
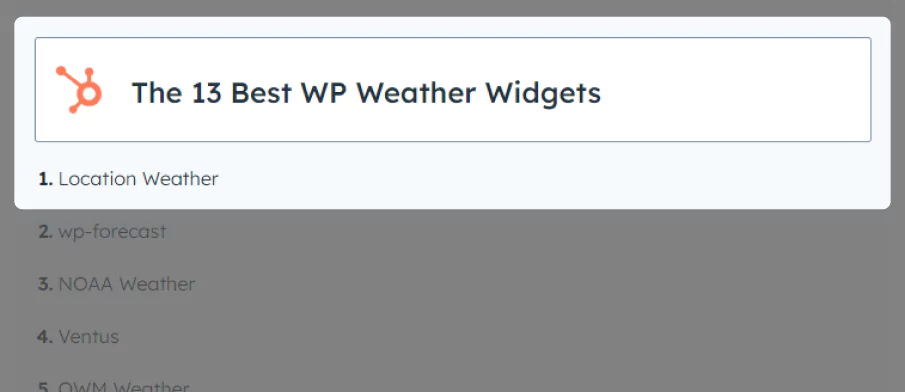
I tested several methods to add a weather widget in WordPress– and one solution stood out: the Location Weather plugin. Not only me, but many prominent platforms, including HubSpot, featured it as the No 1 weather widget plugin for WordPress.
Whether you are a beginner, vibe coder, or developer, Location Weather is easier and time saver– the best forever. Why? Let me tell you.
Why Location Weather is the Best Way to Add a Weather Forecast
Location weather stands out with the following features and differentiators:
- Pre-designed templates library: Import from 100+ forecasts and go, saving many hours.
- Highest Forecasting Capabilities: Detailed Forecast for up to 16 days & 96 hours
- Multiple Free Weather APIs: Collect a free API with your name and email.
- Page builders support: Gutenberg, Elementor, Divi, WP Bakery, and more
- Highly Customizable– No coding needed: Customize everything visually.
- Advanced Weather Data: AQI, Historical weather data, Graphs, Live Map, and more
- Weather for a specific location, visitors’ locations, & any searched locations worldwide.
Let’s install Location Weather and dive into the weather widget library to find out the perfect weather widget for your requirements and preferences.
New to WordPress? Read the easy documentation. It’s simpler than you think.
Installed Location Weather? Let’s add a free weather API to it.
How to Get a Weather API & Add it to Location Weather?
After installing the best weather widget solution, we need a Weather API to source the weather data.
Best Weather APIs for Free & Paid Use
Choosing the right weather API is crucial if you want to display accurate, reliable, and real-time weather data on your website or application.
Here are the best free and paid weather APIs.
| API Name | Free Tier | Key Features | Best For |
|---|---|---|---|
| OpenWeather | Yes- 1 million calls/m | Hourly 96h, Daily 16d, AQI, map | Ease, advanced data, global coverage,WordPress ready |
| WeatherAPI | Yes- 1 million calls/m | Current, forecast, historical, astronomy data | Quick setup, small projects, WordPress ready |
| Open-Meteo | Yes | No API key, global forecasts, fast & lightweight | Free projects, non-commercial use |
| Tomorrow.io | Yes | Hyperlocal data, minute-level forecasts, advanced insights | Advanced & enterprise use |
| Visual Crossing | Yes | Historical data, timeline forecasts, flexible API | Analytics & historical insights |
Let’s follow the simple steps below to get a free or paid weather API and set it in Location Weather.
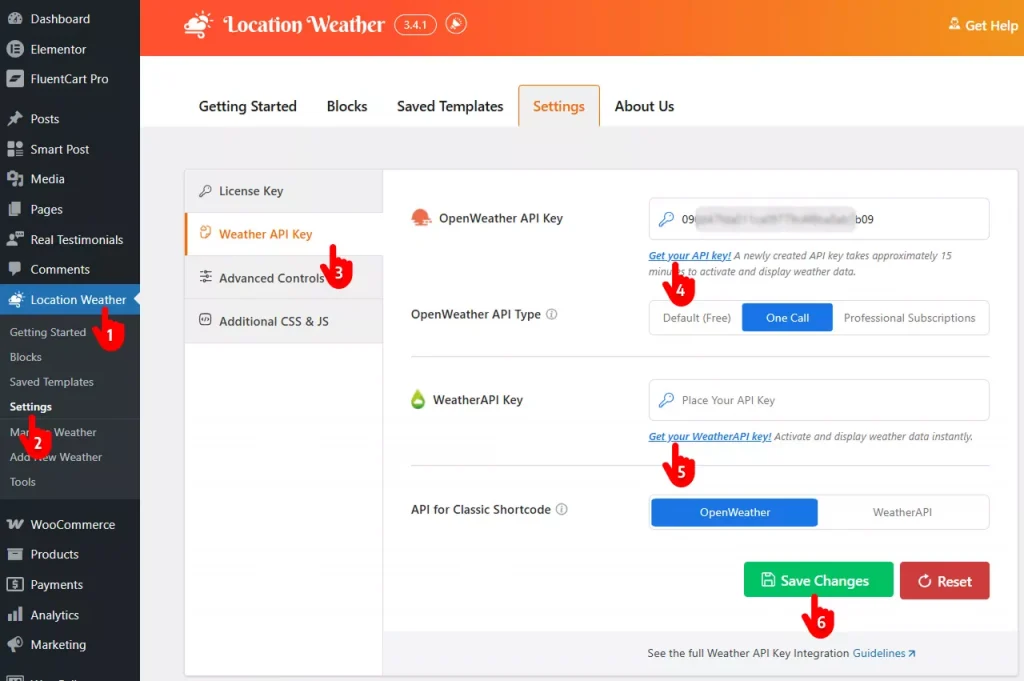
- First, click Location Weather available in your WordPress admin sidebar. Not found it? Install Location Weather now.
- Click Settings in Location Weather menu.
- Navigate to the Weather API Key tab.
- Click Get your API key. It will take you to OpenWeather’s signup page. Sign up with your name and email. Navigate to API in the navbar. Generate API key, copy it, come back to the Location Weather API Setting screen, and paste it in the OpenWeather API Key field.
- You can add a API key from WeatherAPI as well. The process is almost the same.
- Finally, hit the Save Changes button.
2 Simple Steps to add a Weather widget in WordPress Gutenberg
Step 1: Choose A Pre-designed Weather Widget Pattern/Template
If You have already choosed the best weather widget solution and the API key as we discussed above, you are only two steps away from publishing your weather widget. The first step is to choose the perfect pattern based on your requirements and preferences.
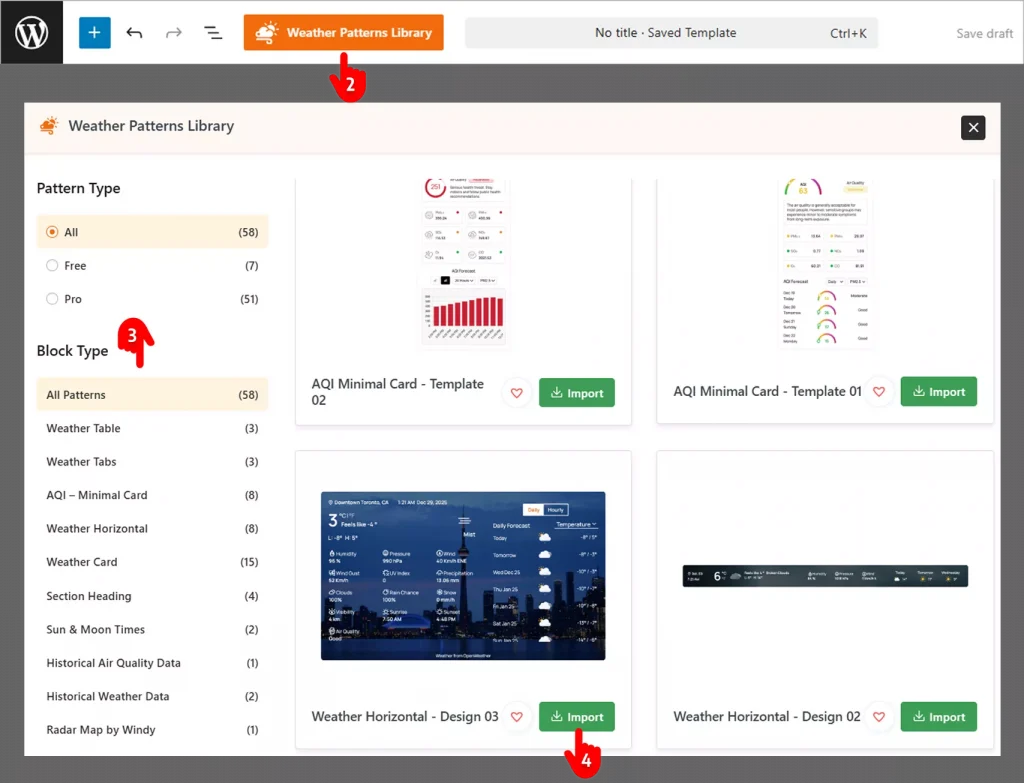
- First, navigate to the page or post where you want to display your weather widget.
- Click the Weather Pattern Library.
- You can navigate the organized list to discover the desired pattern.
- Choose a weather pattern and hit the Import button.
Step 2: Customize And Publish Your Weather Widget
You must have already imported your preferred weather widget template. Now it’s time to make it truly yours by applying your brand colors and essential customizations. With Location Weather, you have full control– just follow the simple steps below to tailor your weather forecast to look exactly how you want.
Change Location & Customize Styles
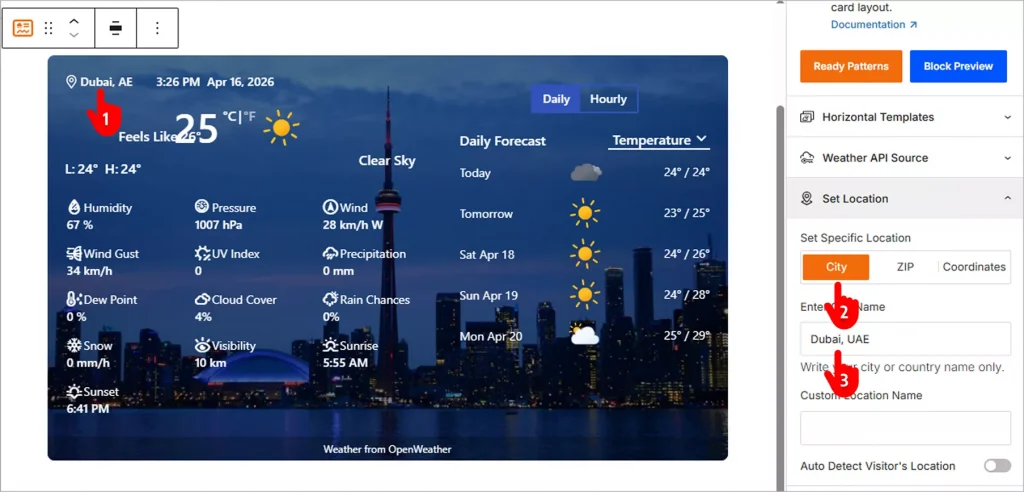
- Click on the location name and go to the open panel on the right sidebar.
- Select City.
- Insert the City Name you want to display the weather forecast for. Thus, you can configure and customize every element. You can also navigate to the style tabs available in almost all panels. You will find the necessary design and customization options in the style tabs. Explore and apply them according to your needs and brand preferences.
- After you complete customizing, click Publish or Update in the top-right corner of the page or post.
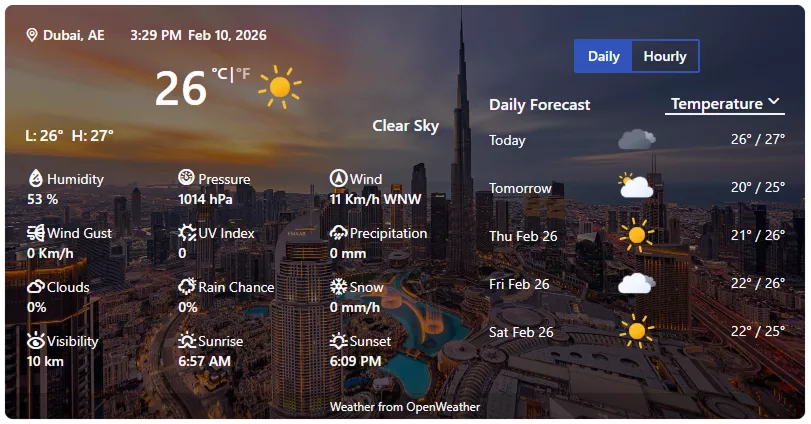
Finally, my weather widget is looking like:
2 Easy Steps to Add a Weather Widget in WordPress Classic
Step 1: Choose a Weather Layout and Customize it
After setting the weather API key from Open Weather Map, it’s time to choose a beautiful weather template for your weather widgets in WordPress and customize it.
Choose a Weather Layout
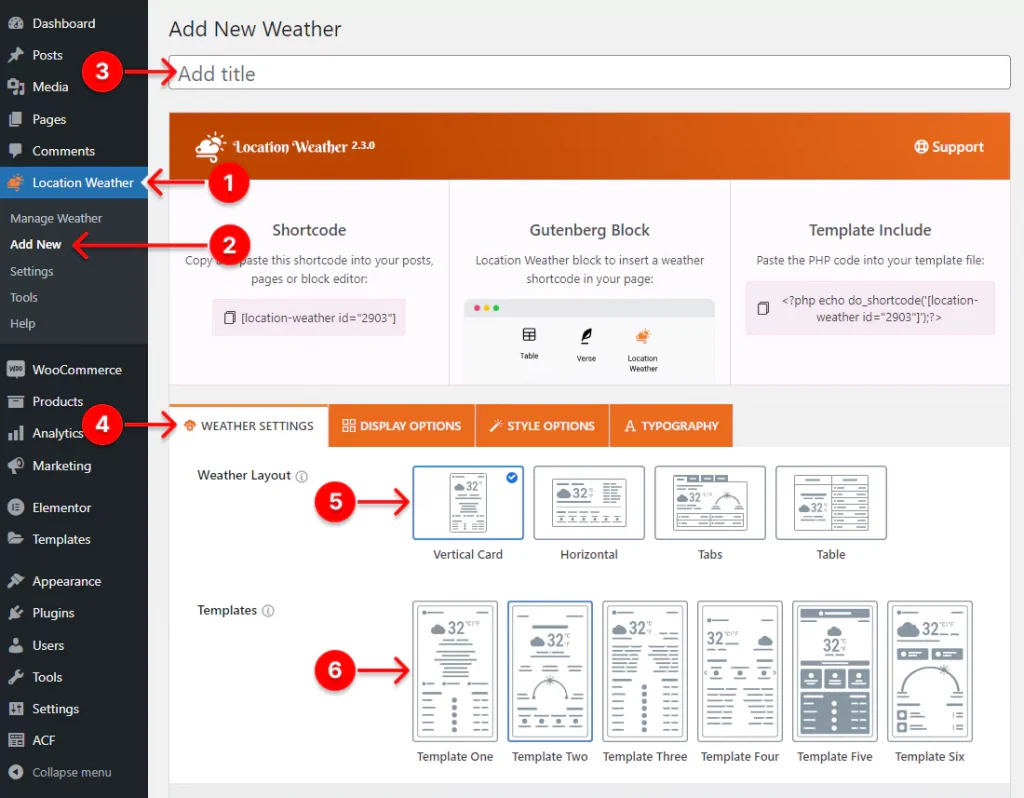
- First, click Location Weather.
- Click Add New.
- Give your weather widget a name.
- Leave the WEATHER SETTINGS tab selected.
- Select the layout you like.
- Location Weather Pro offers you 17 customizable templates. Choose a beautiful template from them.
The PREVIEW button on the bottom right side helps you to watch how the selected template looks and choose the best one for your website.
After choosing a template, it’s time to set the location where you want to show the weather for.
Customize your weather widget
Set the location
After you choose a template, you have to set the location for which you want to display the weather. You have two options:
- Showing weather for your business location.
- Showing weather for your visitors’ locations.
For example, a hotel website needs to show the weather forecast of its location to attract customers to enjoy the hospitality in good weather. On the other hand, a news website needs to show weather updates of visitors’ respective locations to let them know weather updates in their regions. You can simply do it by enabling auto location detection with a single click.

1. Set your business or organization location with city name, city ID, zip code, or coordinates (highly recommended to show forecasts). You can set up any location worldwide.
This option is for hotels and resorts, real estate companies, sports & event organizers, transport & tourism, amusement complexes & theme parks, educational institutes, local organizations, etc.
In addition, Location Weather allows you to set locations from custom fields.
Moreover, you can replace the location name with your favorite one.
2. Enable auto location detection based on visitors’ places.
This option is for News and media, Public safety and environment organizations, Weather-relevant services and products, and any website for a better user experience.
By the way, an initial weather showcase is now ready for your website. Click the PREVIEW button at the bottom right corner to watch how it looks*:
* The weather showcase interface varies based on the layout and template you select.
Now, you can dive into more customization and make it more beautiful and consistent with your website design.
Choose preferred weather units
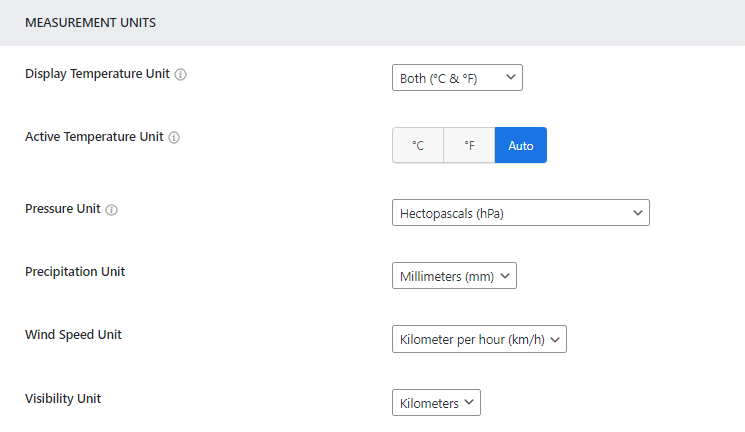
Most countries use Celsius for temperature, but some still use Fahrenheit. So, you should use weather units perfectly based on your visitors’ preferences. Location Weather offers you many options to choose the locally preferred weather data measurement units, including:
- Celsius (°C)
- Fahrenheit (°F)
- Both (°C & °F) Auto
- Precipitation in mm/inch
- 7 Air pressure units
- 4 Wind speed units
- Visibility in kilos/miles
- Date and time formats
Show/hide weather data as per your need
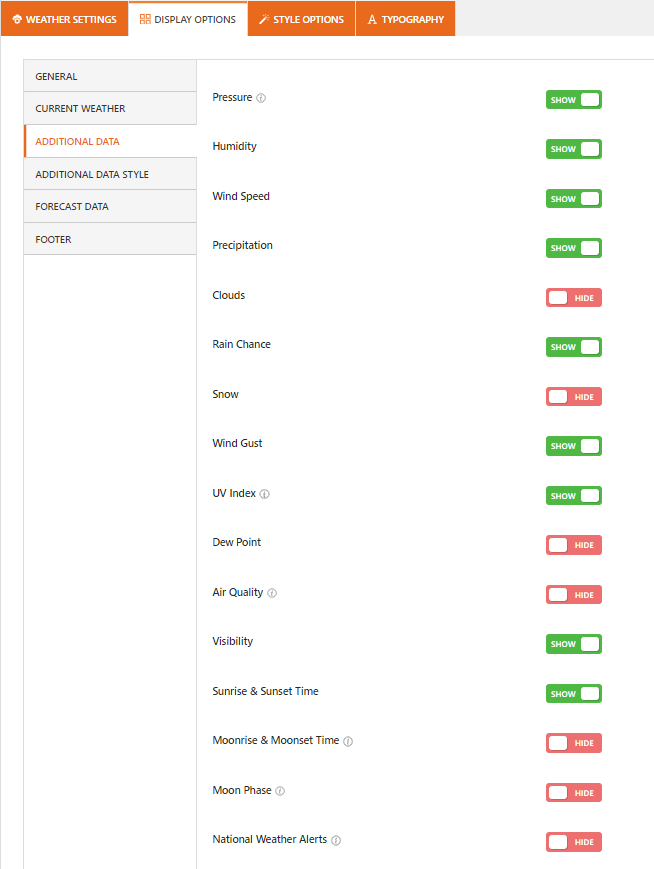
The size of your weather widget for your WordPress website is totally up to you. You can display a small, medium, and large weather widget on your site. Besides the template of different sizes, Location Weather offers your 20+ weather data toggles, as seen above.
Stylize your weather widget in WordPress
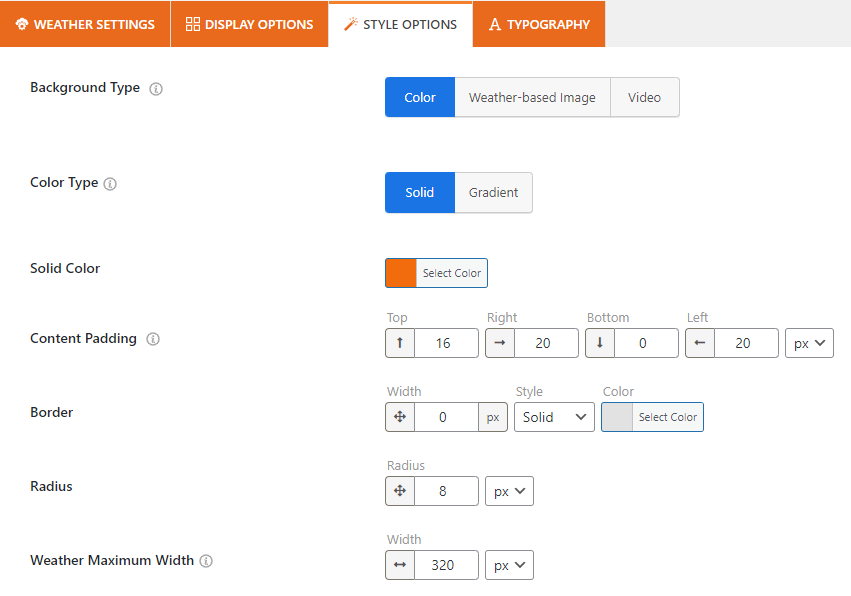
Location Weather is the best weather forecast plugin for WordPress. It offers you a wide range of stylization features. So, you can design your WordPress weather forecast exactly how you want. Some of the features include:
- Weather condition-based background
- Image and video background
- Solid, gradient, and custom color background
- Fill, line, and glassmorphism icon
- Animated custom icon
- Custom overlay color
- Set weather maximum width
- Custom border, radius, and spacing
- Full-featured carousel for additional weather data and forecast (template-based)
- advanced typography (fonts, letter & line spacing, text color, and more)
- Translation ready
Step 2: Publish your weather widget in WordPress
After you accomplish customizing your weather forecasts and make it perfect, it’s time to hit the publish button.
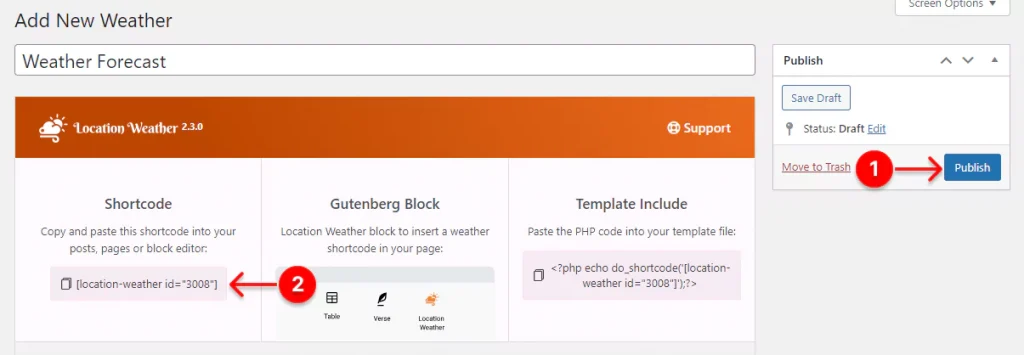
- First, hit the Publish or Update button at the top right corner.
- Next, copy the shortcode.
- Then, go to where you want to publish your weather forecast and paste the shortcode.
- Lastly, hit the Publish or Update button at the top right side.
Great! Your weather forecast is live. Looking awesome!
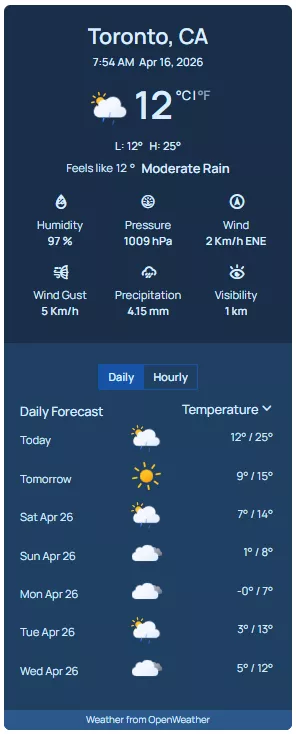
Take away
With the easy steps above, you can add a beautiful weather widget to your WordPress website to help your visitors and your business.
So, let’s add a weather widget now
Do you have any questions about it? Let’s discuss weather widgets in WordPress more in the comment box below.


Leave a Reply