Do you want to create a real time weather map in WordPress?
Location Weather recently released a powerful and easy-to-use feature to create a live world weather map in minutes with no code.
This feature helps global and local businesses that have multiple branches, as well as government and non-government organizations to provide real-time weather updates for many locations worldwide at a time.
So, let’s get in.
5 Easy Steps To Create a Weather Map in WordPress
Step 1: Install and Activate Location Weather
Location Weather is the best WordPress weather plugin. It has the highest rating, active installations, and 5-star reviews in WordPress’s official plugin repository. Also, the world’s top platforms, such as Hubspot, WP Beginner, WP Engine, and more, featured it as the #1 weather plugin.
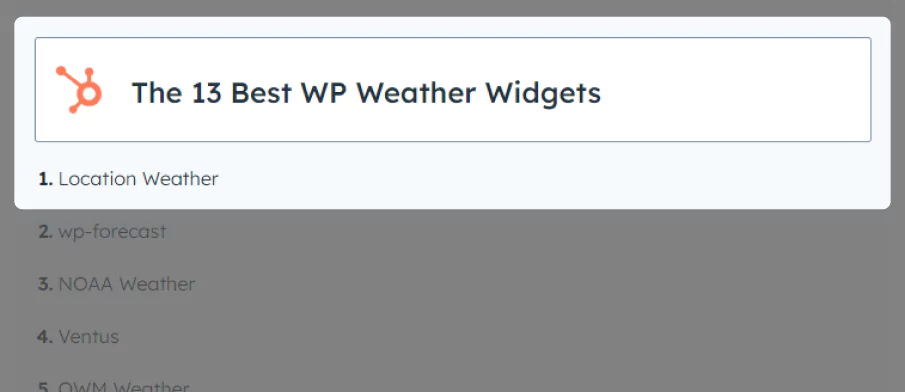
The combination of powerful features, thoughtful user experience, intuitive interface, consistent updates, compatibility with the latest WordPress version and standard plugin, themes page builders, expert support team, and users’ support for the plugin has earned it the title of the #1 WordPress weather plugin.
So, let’s install Location Weather. It’s simple.
However, if you are new (future pro), you can see the documentation.
Step 2: Get a Free Weather API Key
Upon installing and activating Location Weather, you will find it on your WordPress admin sidebar, as seen in the next image. Now, follow the easy steps below to get a free weather API key from OpenWeather and set it in Location Weather.
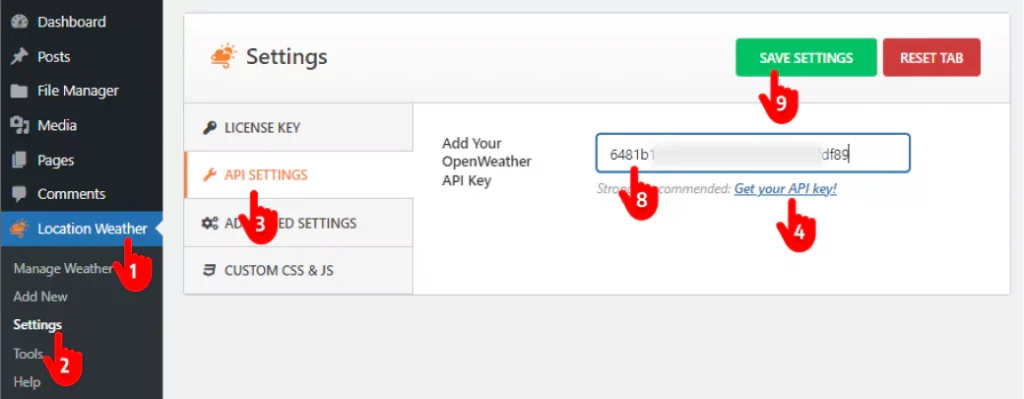
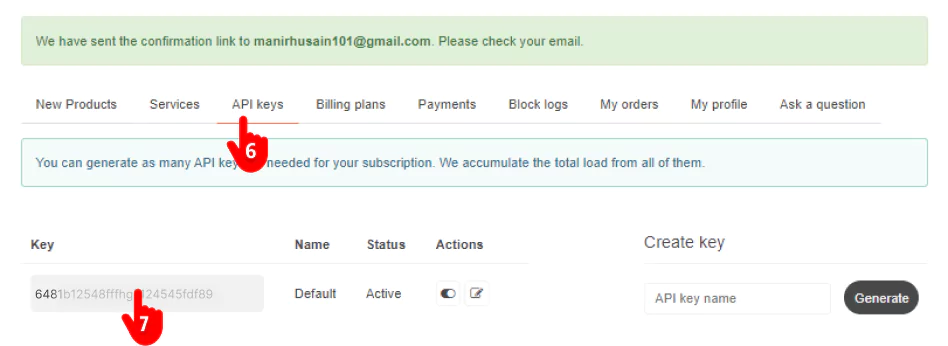
First, 1. Navigate to Location Weather. → 2. Click Settings. → 3. API SETTINGS → 4. Get your API key. It will take you to the Sign Up page on openweathermap.org. → 5. Sign up with your name and email to have a free API key. → 6. Click the tab API keys. → 7. Copy the API key and get back to Location Weather on your WordPress dashboard. → 8. Paste your API key in the field. → 9. Hit the SAVE SETTINGS button.
Step 3: Choose the Map Layout and Put the Location
Follow the simple steps below.
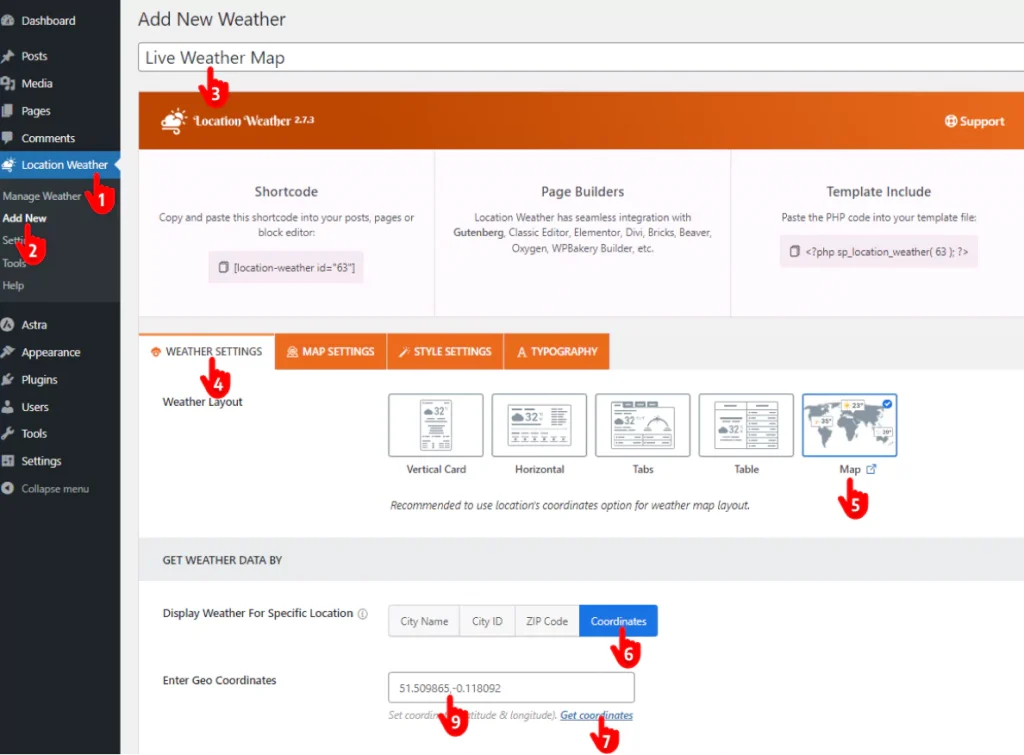
- First, go to your WordPress dashboard and navigate to Location Weather.
- Click Add New
- Give your weather map shortcode a title.
- Leave the WEATHER SETTINGS tab selected.
- Choose the Map layout.
- Select the Coordinates option.
- Get the main location coordinates.
- Put the location name and get its coordinates.
- Paste the location coordinates here.
- Scroll down and choose the weather units based on your visitors’ preferences.
Step 4: Design Your Weather Map
A basic weather map is already ready to be published. However, you can make it functionally and aesthetically more pleasing.
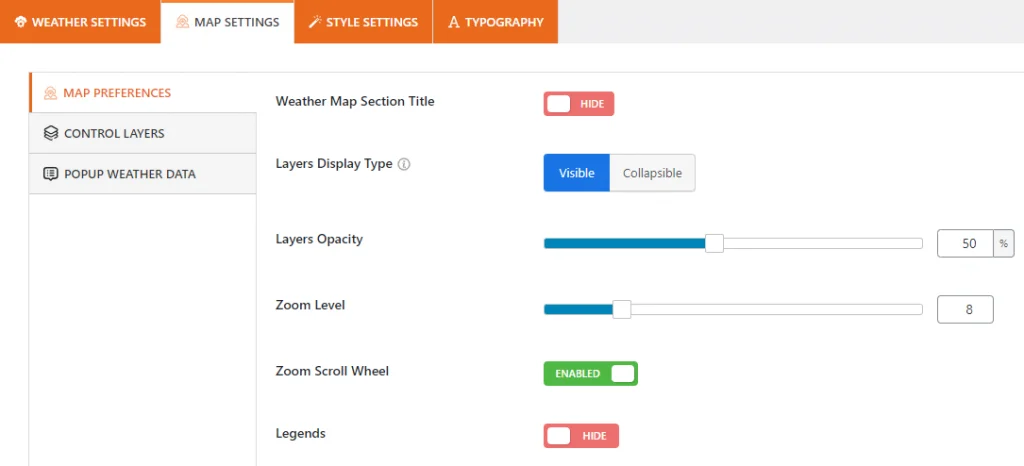
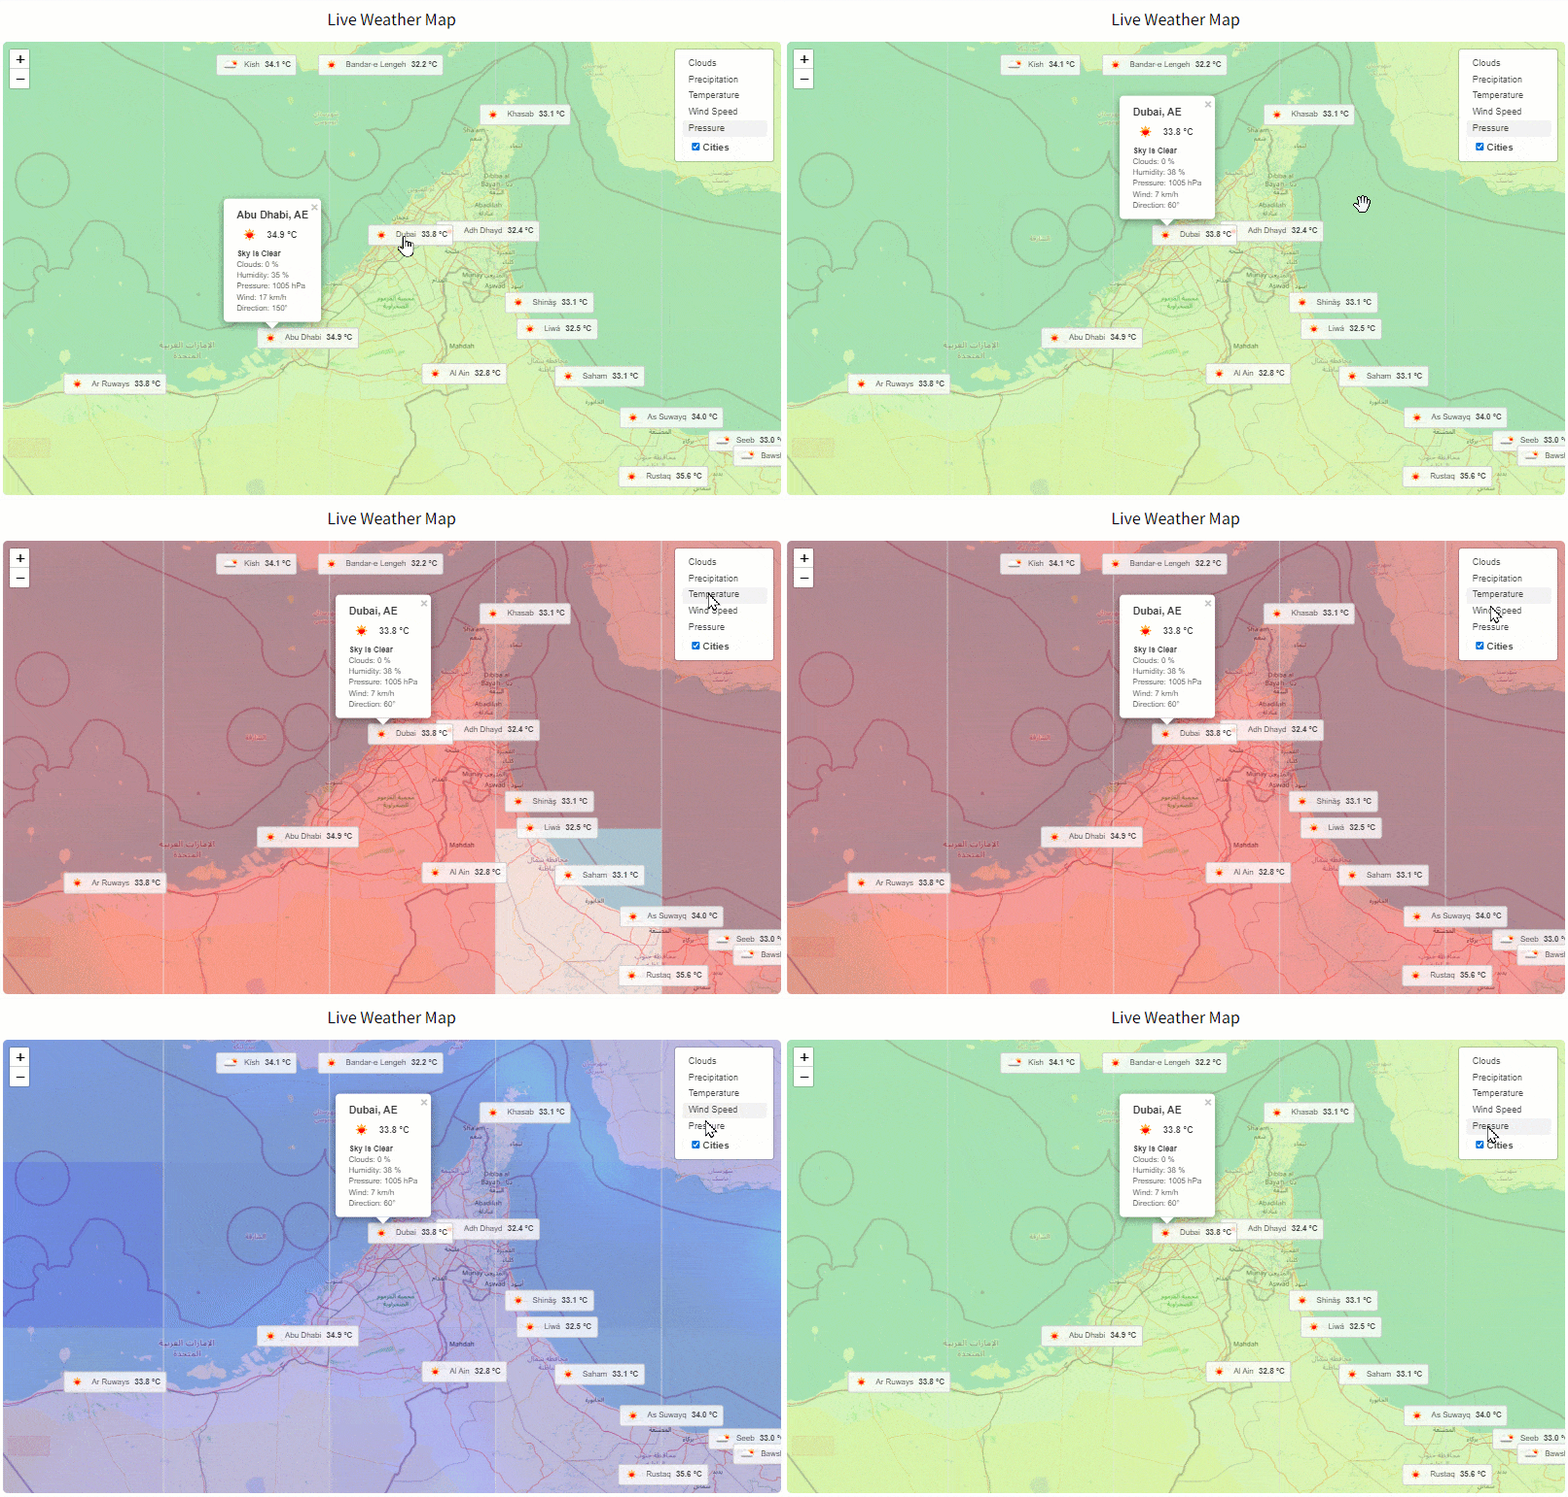
You can make the temperature, wind, pressure layers, etc. always visible or collapsible. It allows you to set layer opacity and zoom level for the best experience. You can also enable the zoom scroll wheel and legends for a clearer view.
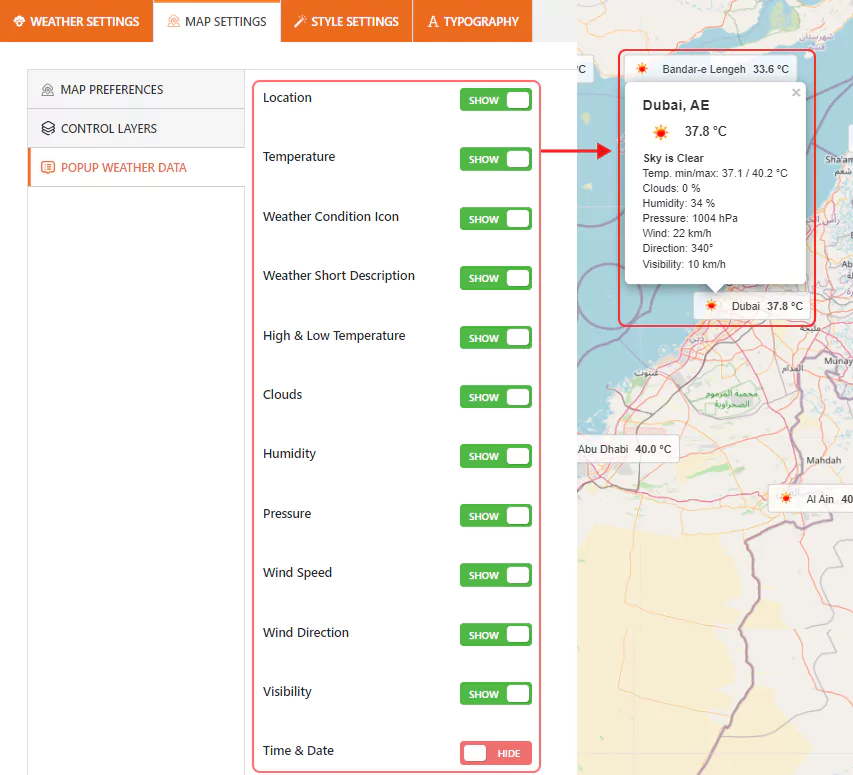
You can also display as much weather information as needed on popups.
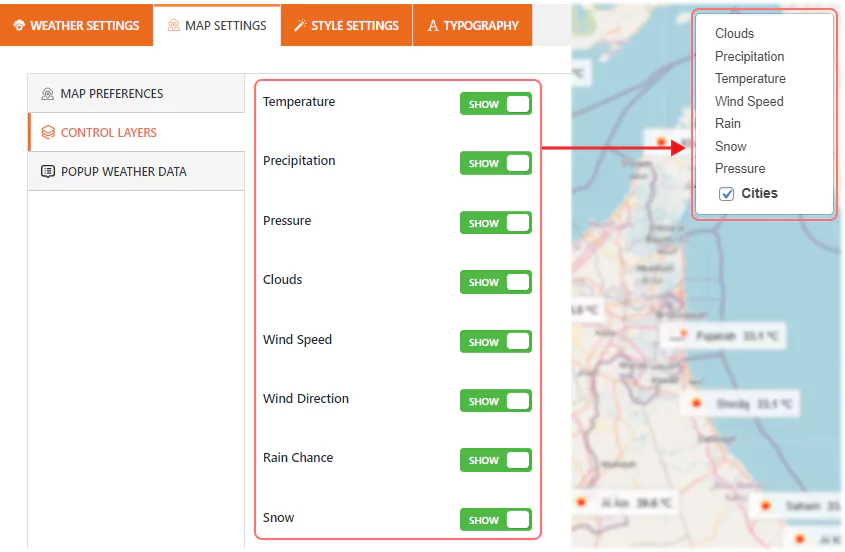
Turn on/off the toggles to provide information per your visitors’ needs.
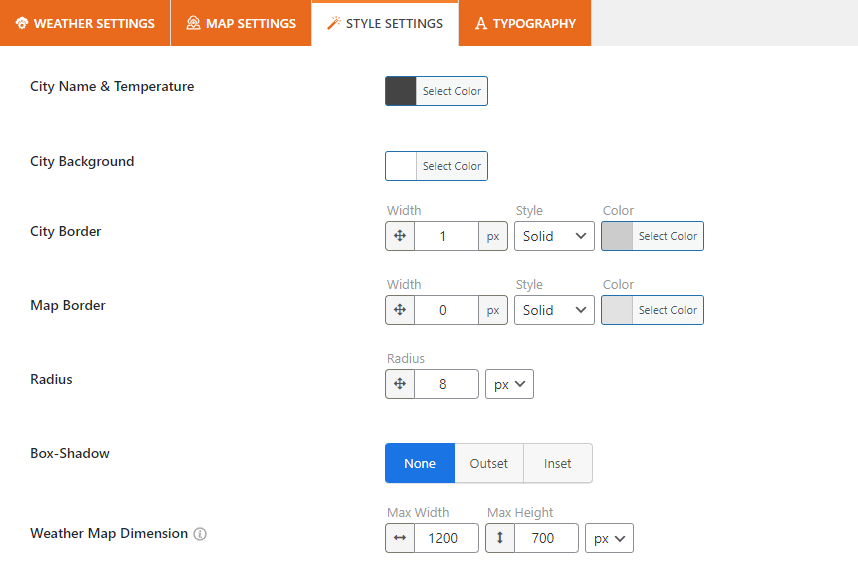
Location Weather lets you seamlessly customize the appearance of your weather map. The best weather plugin provides the best customization experience.
Step 5: Publish the Weather Map in WordPress
You have seen the preview of your weather map several times and revamped it. Haven’t you? If everything sounds perfect, it’s time to hit the publish button.

First, publish the shortcode by clicking on the Publish button at the top right corner. Next, copy the shortcode and go to the page or post where you want to publish it. Paste the shortcode and hit the Publish or Update button on the top right corner.
Great! It’s live now.
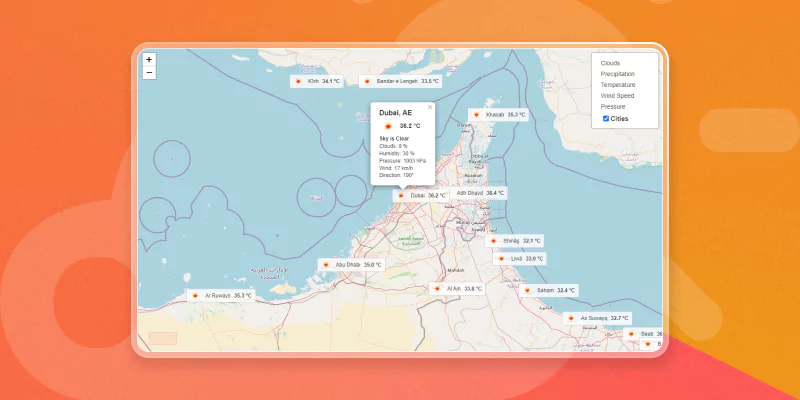
This is how a basic Weather map looks.
However, Location Weather gives you full freedom to utilize your creative power and make the weather map more beautiful.
So, get the Location Weather and create your weather map in WordPress today.
Leave a Reply