
When you need to display a lot of data on a weather showcase, nothing can help you better than the weather forecast table.
Recently, Location Weather brought the weather table layout that helps you create a beautiful weather forecast table in minutes without writing code.
So, let’s dive in.
5 Easy Steps To Create a Weather Table in WordPress
Step 1: Install and Activate Location Weather
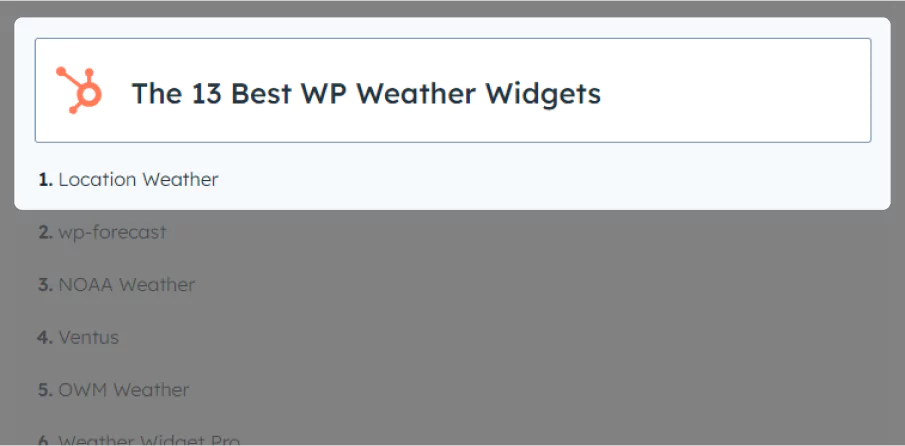
Location Weather stands as the best WordPress weather plugin with the highest ratings, most active users, and 5-star reviews in the official WordPress plugin directory. It’s also been recognized as the No. 1 weather plugin by the World’s top platforms like HubSpot, WPBeginner, and WP Engine.
Thoughtful functionalities, intuitive admin interfaces, consistent updates, ease of use, compatibility with the latest WordPress version and all standard plugins & themes, expert support team, and users’ support for the plugin have earned it the #1 WordPress weather plugin title.
So, let’s install Location Weather. It’s easy peasy.
However, if you are a newcomer (future master), you can read the documentation.
Step 2: Get a Free Weather API Key
Once you’ve installed and activated Location Weather, you’ll see it appear in your WordPress admin left sidebar, as shown in the image below. Simply follow the straightforward steps outlined below to obtain a free weather API key from OpenWeather and set it up in Location Weather.
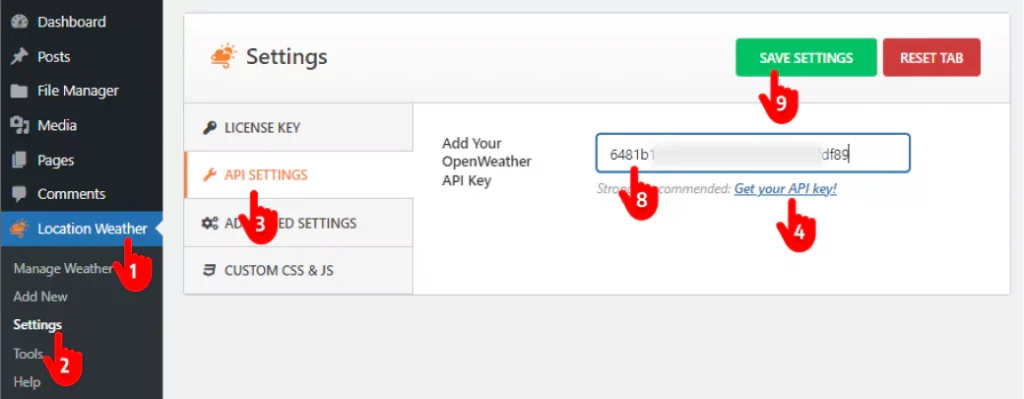
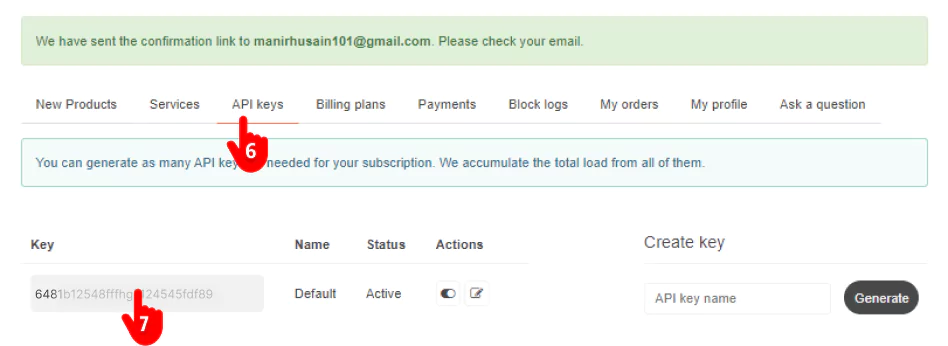
First, 1. Navigate to Location Weather on your WordPress admin sidebar. → 2. Then, click Settings. → 3. API SETTINGS → 4. Get your API key. You are now on the openweathermap.org Sign Up page. → 5. Simply sign up using your name and email to get a free API key. → 6. Click the tab API keys. → 7. Copy the API key and come back to Location Weather Settings on your WordPress dashboard. → 8. Paste your API key in the field. → 9. Hit the SAVE SETTINGS button.
Step 3: Choose the Table Layout and a Location
Follow the simple steps below.
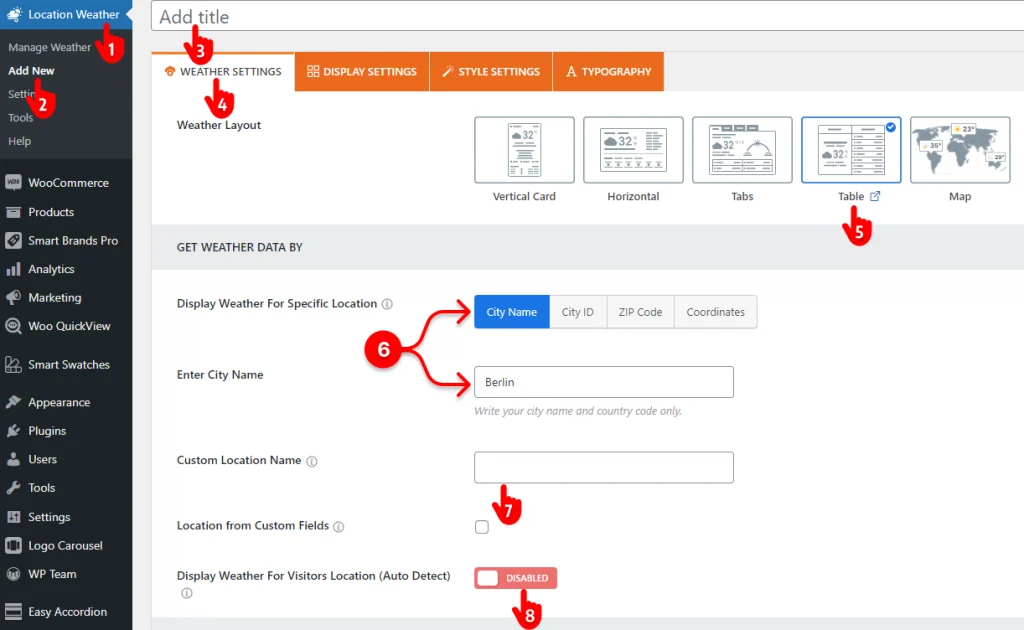
- First, go to your WordPress dashboard and click Location Weather.
- Click Add New
- Give your weather table shortcode a title.
- Leave the WEATHER SETTINGS tab selected.
- Choose the table layout.
- Input the city name for which you want to display the weather.
- You can change the location name with your business name or whatever you like.
- To display the weather for visitors’ respective locations, you only need to enable this toggle.
- Scroll down and choose the weather units your visitors prefer.
Step 4: Design Your Weather Forecast Table
A basic weather forecast table has already been built to be published. Click the Preview button at the bottom right to see how it looks. So far so good, right?
However, Location Weather provides you with a wide range of configurations and customizations to make it functionally and aesthetically super pleasing.
Navigate through the tabs and nested tabs to find all those configurations and customizations. They are intuitive and very easy to use. Explore them attentively and use them according to your requirements and preferences.
Turn on the toggles to show weather additional data as per your requirements.
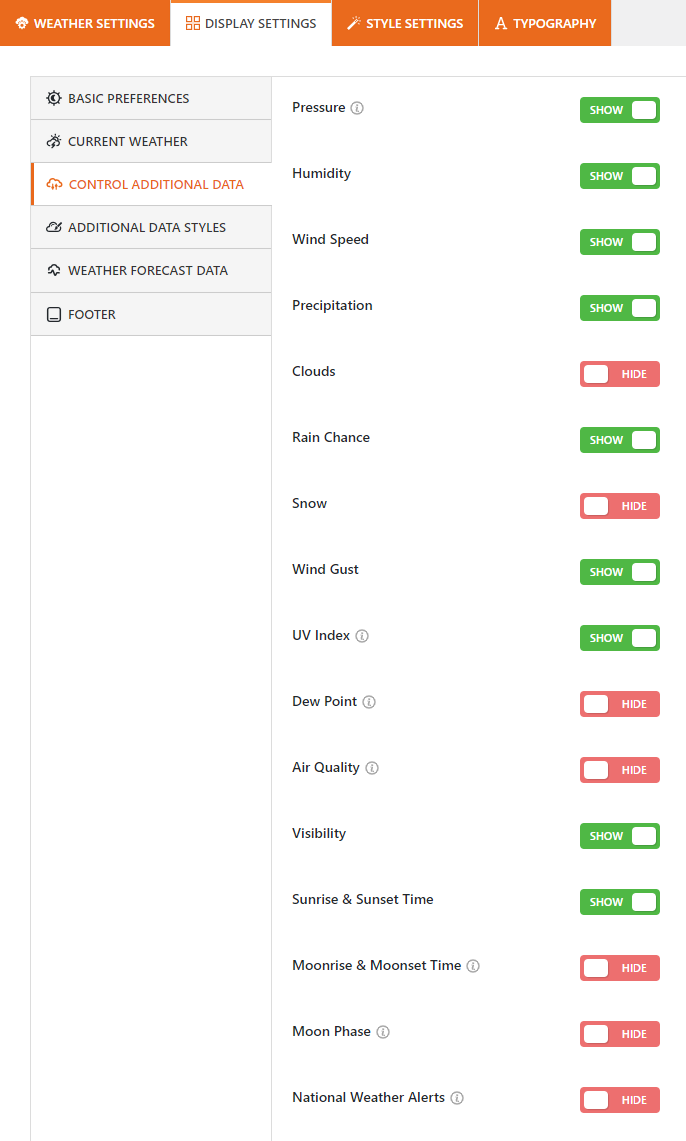
Set the weather forecast according to your preferences.
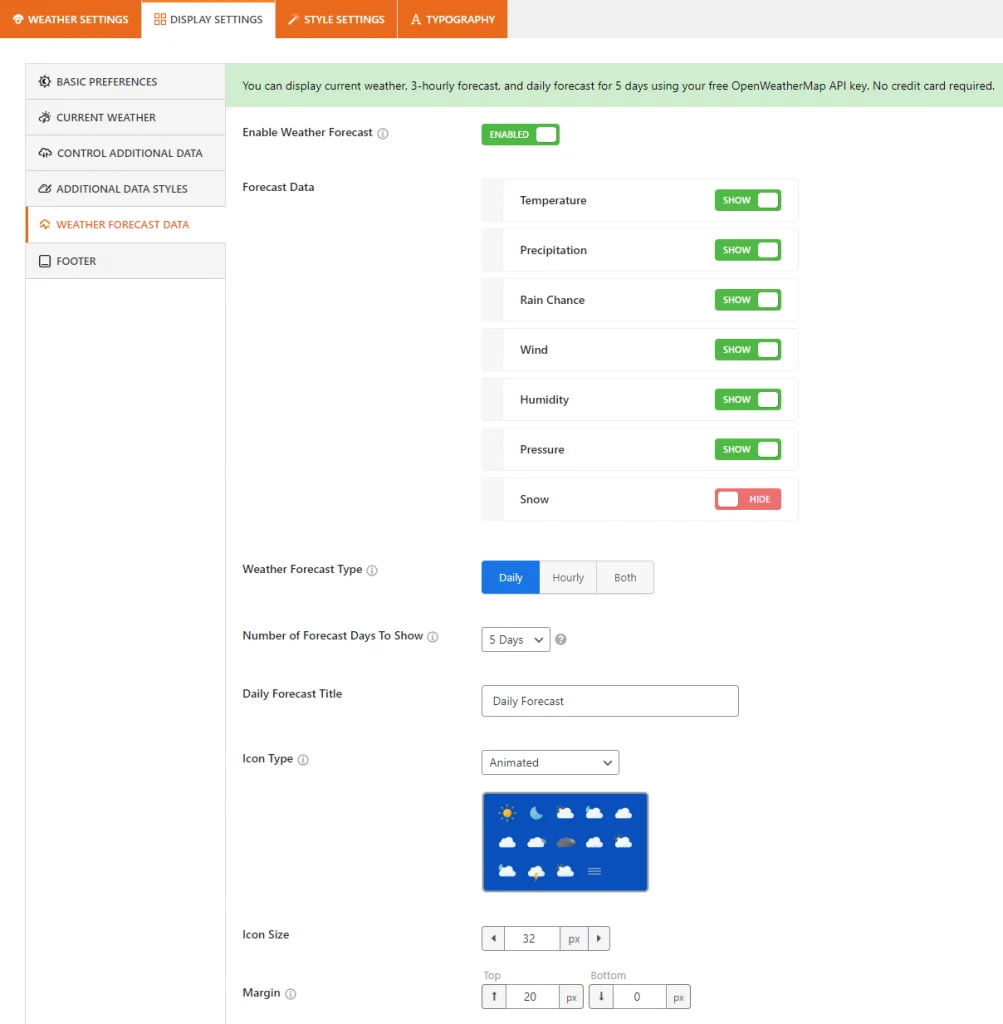
Stylize the weather forecast data table how you want.
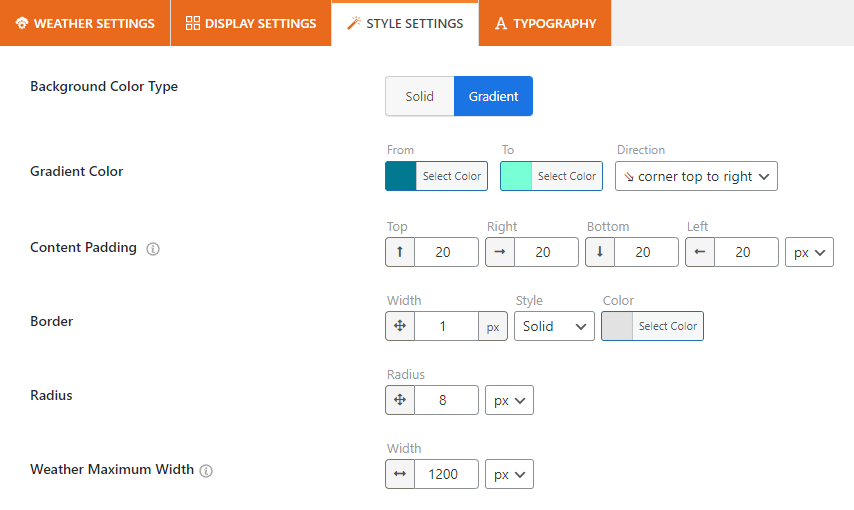
You can try the features according to your requirements and your website visitors’ preferences.
Step 5: Publish the Weather Forecast Table
If your weather forecast data table sounds perfect, it’s time to hit the publish button to add the weather forecast to the website.
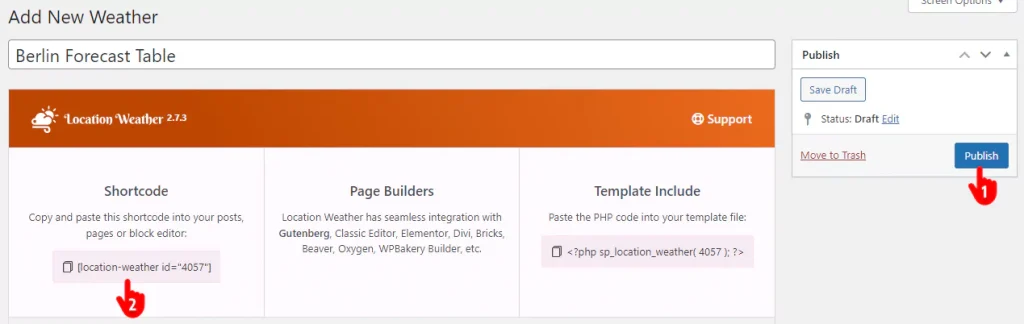
- First, click the Publish or Update button at the top right.
- Next, copy the weather table shortcode.
- Then, go to where on your WordPress website you want to publish your weather forecast data table and paste the shortcode.
- Lastly, hit the Publish or Update button at the top right.
Great! Your weather forecast table is live.
However, besides the shortcode, Location Weather offers you a Gutenberg block and PHP code to publish your weather forecast table in your suitable way.
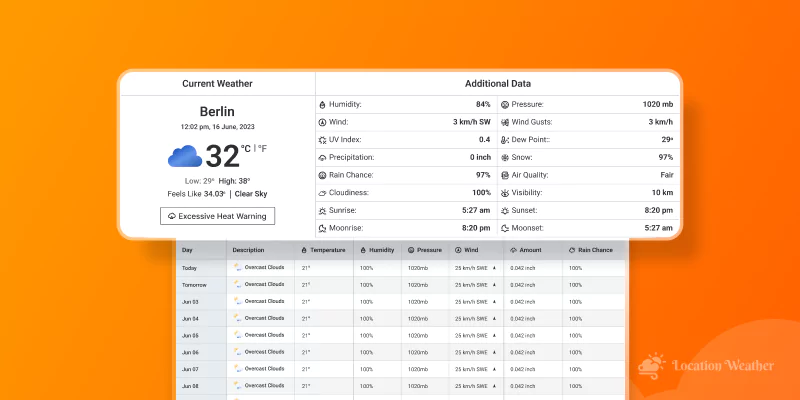
This is how a basic weather forecast looks.
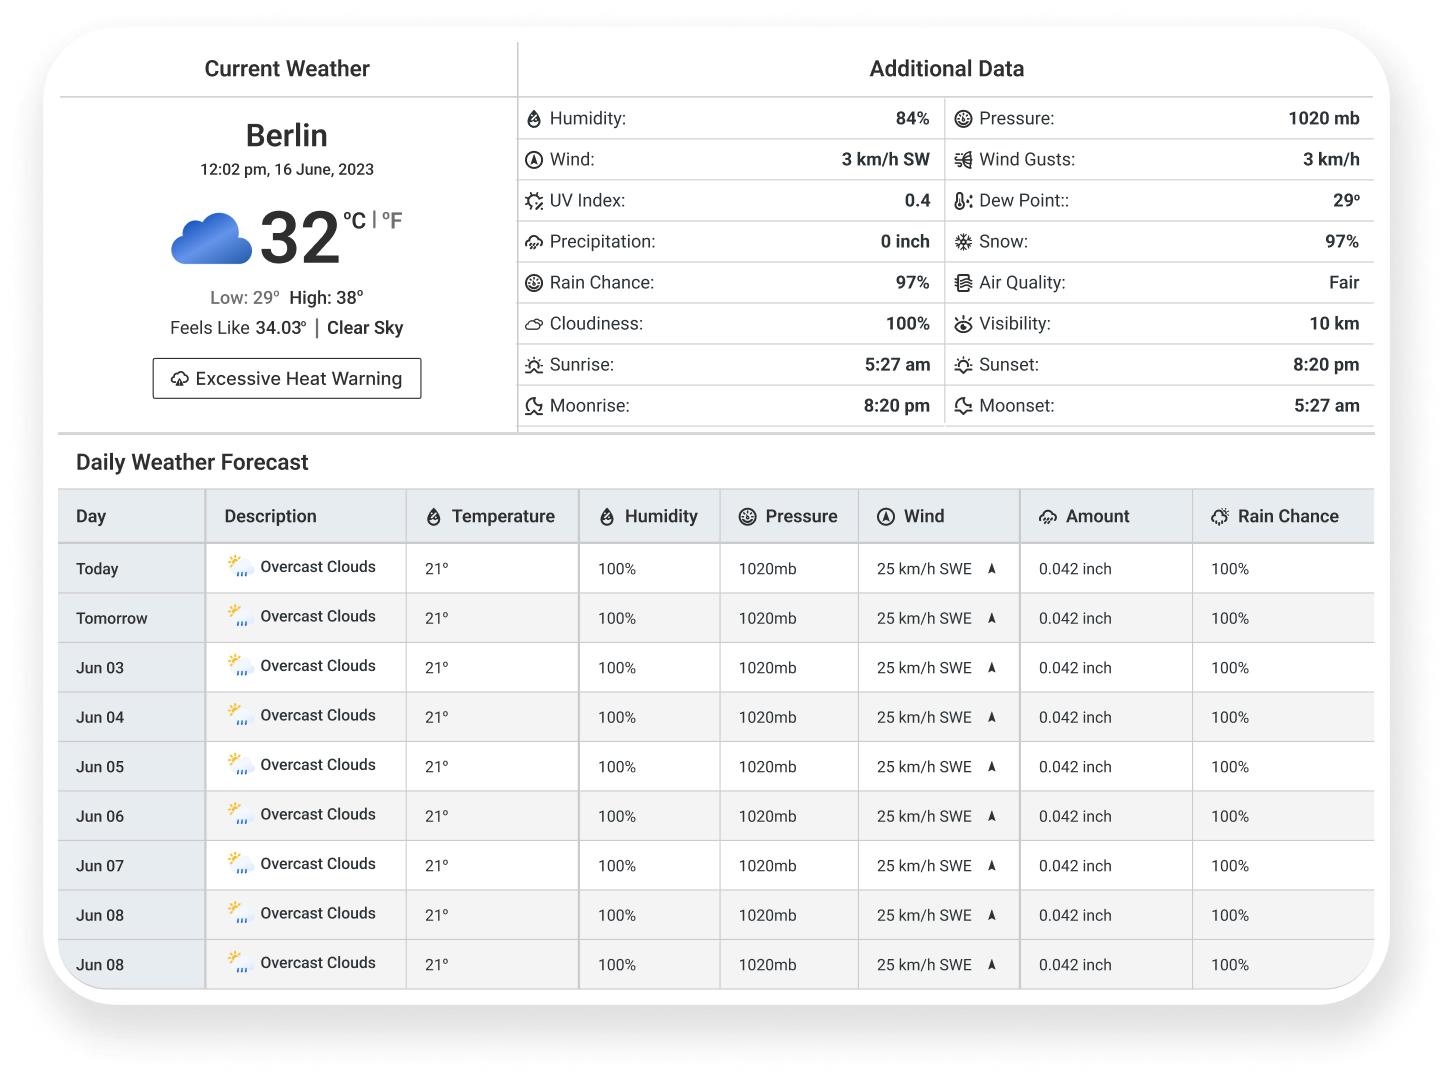
However, Location Weather offers plenty of customizations to utilize your creative power and make the weather forecast table more beautiful.
So, get the Location Weather and create your weather forecast table in WordPress today.


Leave a Reply